Appearance
Store Settings
Store settings let you configure the core identity, appearance, email delivery, integrations, supported countries, and languages for your store. You can find all settings pages under the Settings group in the admin sidebar.
Tip: If you just completed onboarding, you already configured most of these during setup. You can update any of them at any time from these pages.
General
The General settings page covers your store's identity, physical address, branding assets, and social media links.
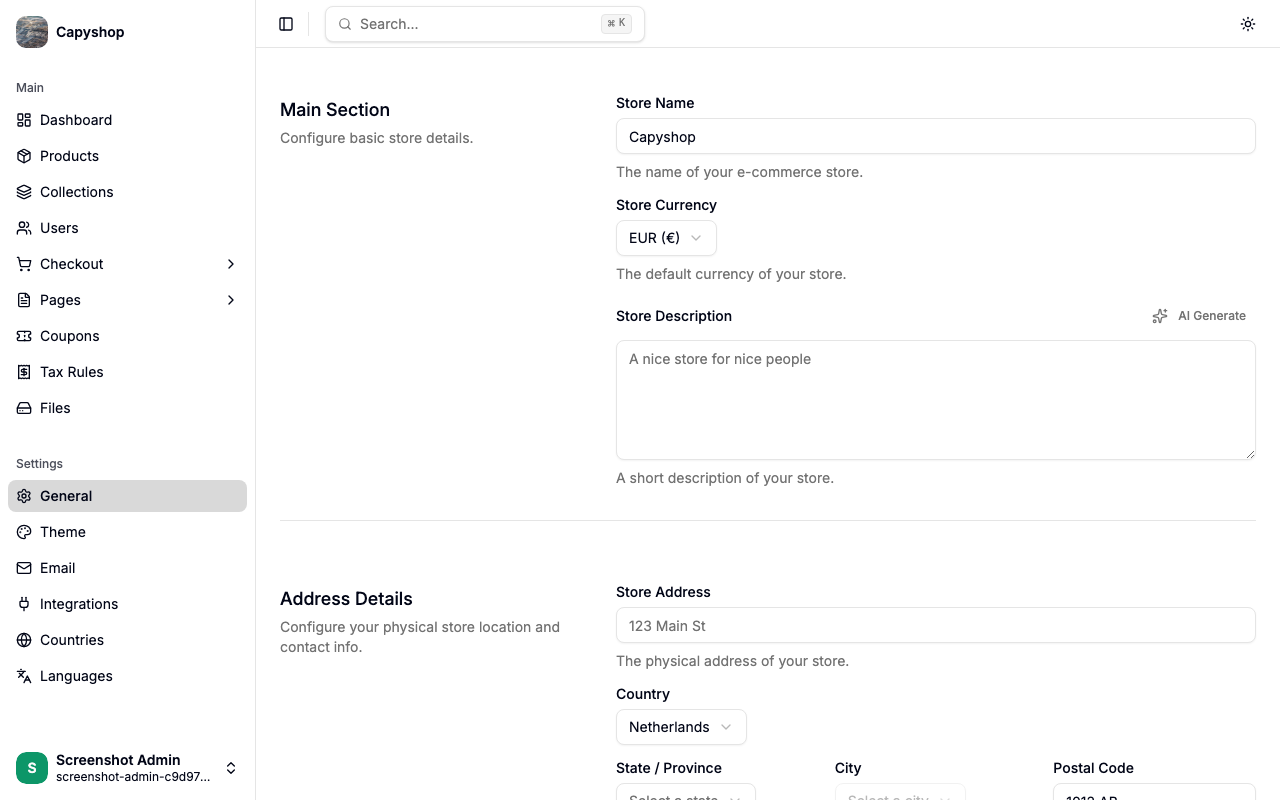
Main section
| Field | Required | Notes |
|---|---|---|
| Store Name | Yes | Shown in the browser tab, emails, and SEO meta tags |
| Store Currency | Yes | The default currency for prices and checkout |
| Store Description | No | A short summary of your store. Can be generated with AI if enabled |
Address details
| Field | Required | Notes |
|---|---|---|
| Store Address | No | Your physical business address |
| Country | Yes | The country where your business is based |
| State / Province | No | Appears after selecting a country |
| City | No | Appears after selecting a state |
| Postal Code | No | Your business postal/zip code |
| Store Phone | No | Public phone number for your store |
| Customer Support Hours | No | e.g. "Mon–Fri 9am–5pm" |
Branding & images
Upload your brand assets here. All images accept PNG, JPEG, SVG, or WebP unless noted otherwise.
| Field | Notes |
|---|---|
| Logo | Your main store logo, displayed in the storefront navbar and emails |
| Favicon | The small icon shown in the browser tab (accepts ICO, PNG, or SVG) |
| Auth Banner Image | Background image shown on the sign-in and sign-up pages |
| Store Icon | A square icon used for app-like contexts (PWA, mobile bookmarks) |
Social media
| Field | Notes |
|---|---|
| X (Twitter) URL | Link to your X/Twitter profile |
| Facebook URL | Link to your Facebook page |
| Instagram URL | Link to your Instagram profile |
| TikTok URL | Link to your TikTok account |
| WhatsApp URL | Link or phone number for WhatsApp |
| Social Media Chat Button | Toggle to show a floating chat button on the storefront |
| Platform | Choose WhatsApp or Instagram as the chat button destination |
Click Save Settings when you are done.
Theme
The Theme settings page redirects you to the Page Builder with the theme panel open. From there you can customize colors, fonts, and light/dark mode preferences.
See Page Builder for full details.
Email
Configure outbound email so your store can send order confirmations, shipping updates, and other notifications to customers.
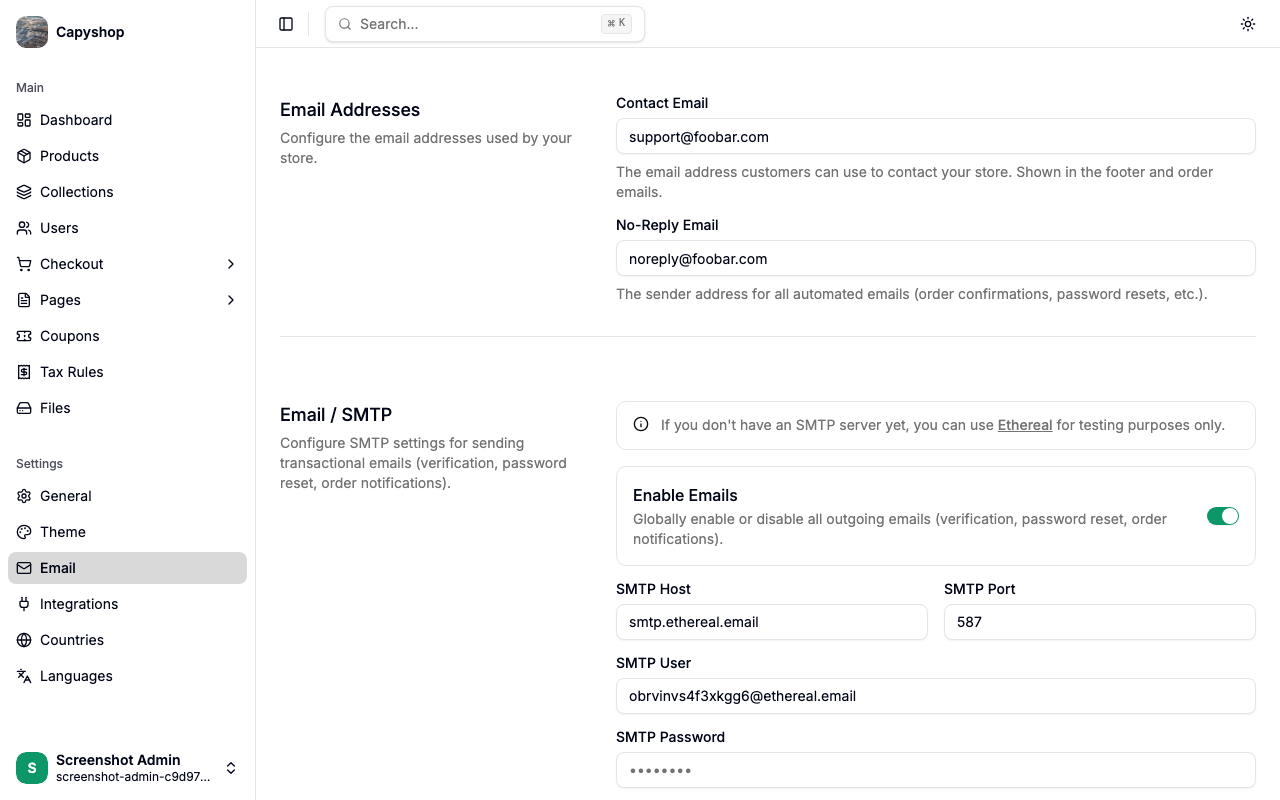
Email addresses
| Field | Notes |
|---|---|
| Contact Email | The public support email shown to customers |
| No-Reply Email | Used as the sender address for automated emails |
SMTP configuration
You will need the SMTP credentials from your email provider (Gmail, SendGrid, Mailgun, etc.).
| Field | Notes |
|---|---|
| SMTP Host | Your mail server hostname (e.g. smtp.sendgrid.net) |
| SMTP Port | Usually 587 for TLS or 465 for SSL |
| SMTP User | Your SMTP login username |
| SMTP Password | Your SMTP login password |
Tip: Save your settings first, then use the Send test email button to verify your SMTP configuration is working.
Important: SMTP credentials can also be configured through
SMTP_HOST,SMTP_PORT,SMTP_USER, andSMTP_PASSWORDenvironment variables. When an environment variable is set, the matching field in this form is disabled and shows "Configured by environment variable" — the value from the environment takes precedence. See Docker Deployment for details.
Notification customization
Below the SMTP settings you will find eight notification types. Each one can be individually enabled or disabled, and each has a Custom Text editor where you can add a personalized message that will appear in the email sent to the customer.
| Notification | When it is sent |
|---|---|
| New Order | When a customer places a new order |
| Paid | When payment is confirmed |
| Shipped | When the order is marked as shipped |
| Delivered | When the order is marked as delivered |
| Cancelled | When the order is cancelled |
| Returned | When a return is processed |
| Refunded | When a refund is processed |
| Payment Failed | When payment processing fails |
Integrations
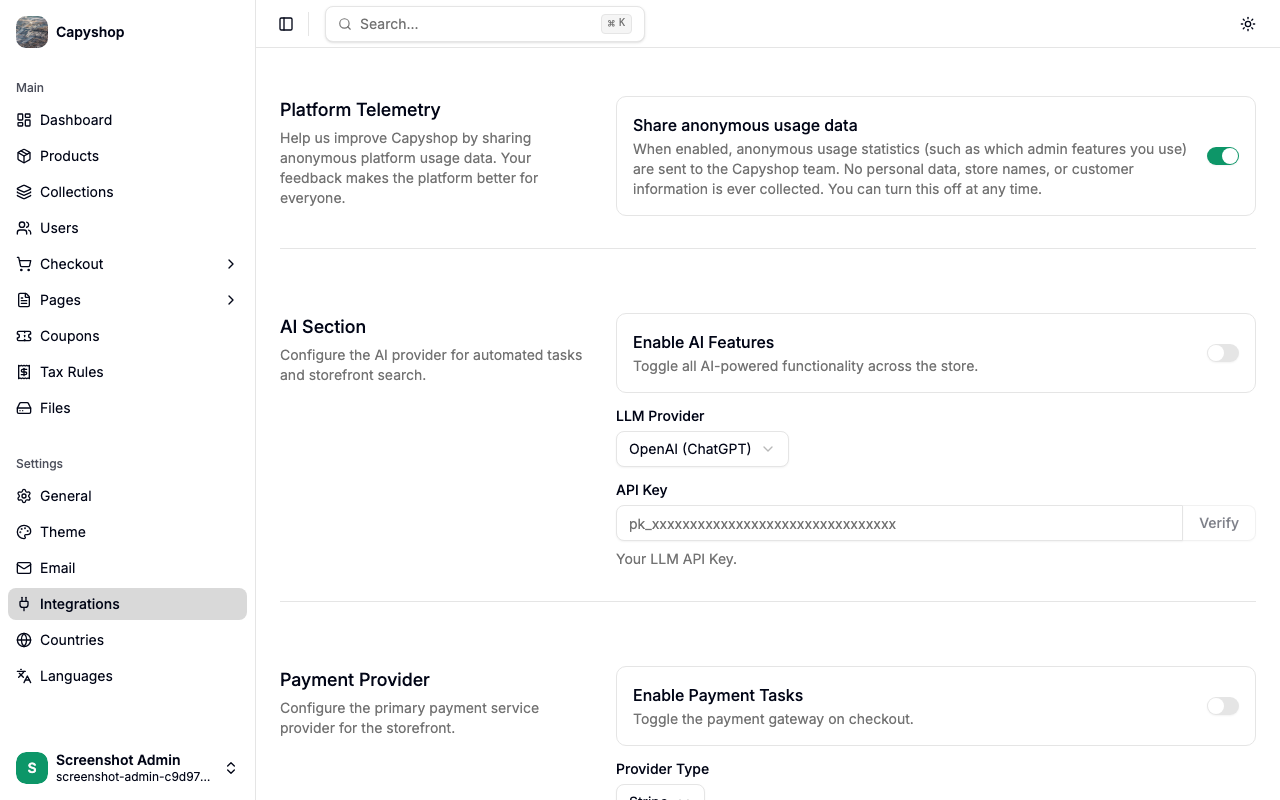
Connect optional third-party services to unlock additional features. All integrations are optional — you can skip any of them and come back later.
| Integration | What it enables |
|---|---|
| Platform Telemetry | Share anonymous usage data to help improve Capyshop |
| AI (OpenAI / Anthropic) | AI-powered product descriptions and search |
| Stripe | Credit card and digital wallet payments at checkout |
| Google Auth | "Sign in with Google" for customers |
| Facebook Auth | "Sign in with Facebook" for customers |
AI configuration
| Field | Notes |
|---|---|
| Enable AI | Toggle to enable AI features across the platform |
| LLM Provider | Choose between OpenAI (ChatGPT) or Anthropic (Claude) |
| API Key | Your provider's API key. Use the Verify button to test it |
Payment provider (Stripe)
| Field | Notes |
|---|---|
| Enable Payment | Toggle to enable Stripe payments |
| Provider Type | Currently only Stripe is supported |
| Secret Key | Your Stripe Secret Key (sk_...). Use Verify to test it |
| Publishable Key | Your Stripe Publishable Key (pk_...) |
| Webhook Secret | Your Stripe webhook signing secret (whsec_...) |
Social login (Google & Facebook)
For each provider, you need to create an OAuth application in the respective developer console and fill in the credentials.
| Field | Notes |
|---|---|
| Enable | Toggle to enable the sign-in option for customers |
| Client ID | The OAuth client/app ID from the provider's developer console |
| Client Secret | The OAuth client/app secret |
| Callback URL | Displayed as a read-only field — copy this into your provider's config |
Note: Enabling platform telemetry sends anonymous admin panel usage statistics (such as which features you use) and unhandled application errors to the Capyshop team, so the team can fix bugs as they happen in the wild. No personal data, store names, or customer information is ever collected. You can turn it off at any time.
Countries
Manage which countries your store supports. The countries list determines which options are available in address selectors across the storefront and checkout.
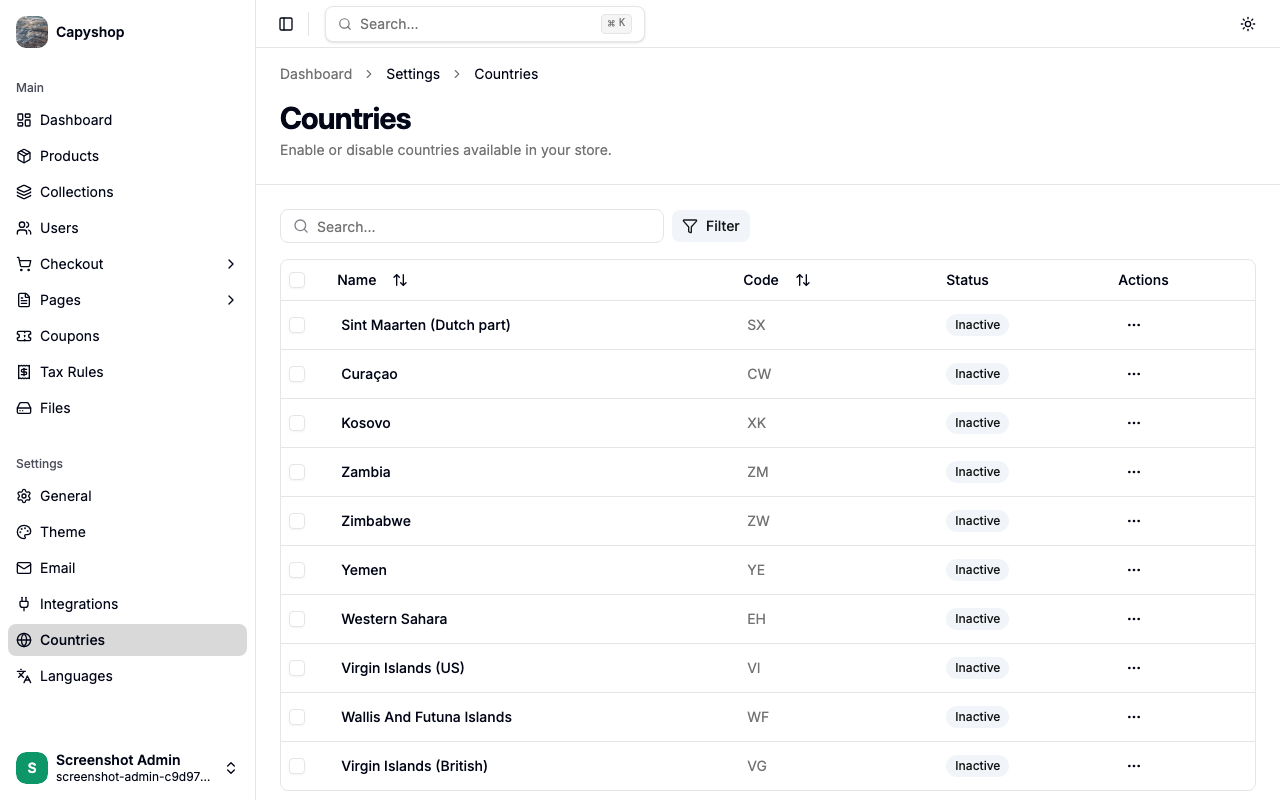
| Column | Description |
|---|---|
| Name | Country name (sortable) |
| Code | ISO country code (sortable) |
| Status | Active (available to customers) or Inactive |
You can search by country name, filter by status, and sort by any column.
Bulk actions
Select one or more countries using the checkboxes, then use the bulk actions bar:
- Activate — make selected countries available
- Deactivate — hide selected countries from customers
You can also toggle individual countries via the ... menu on each row.
Languages
Choose which languages your storefront will be available in. At least one language must be enabled — it does not have to be English.
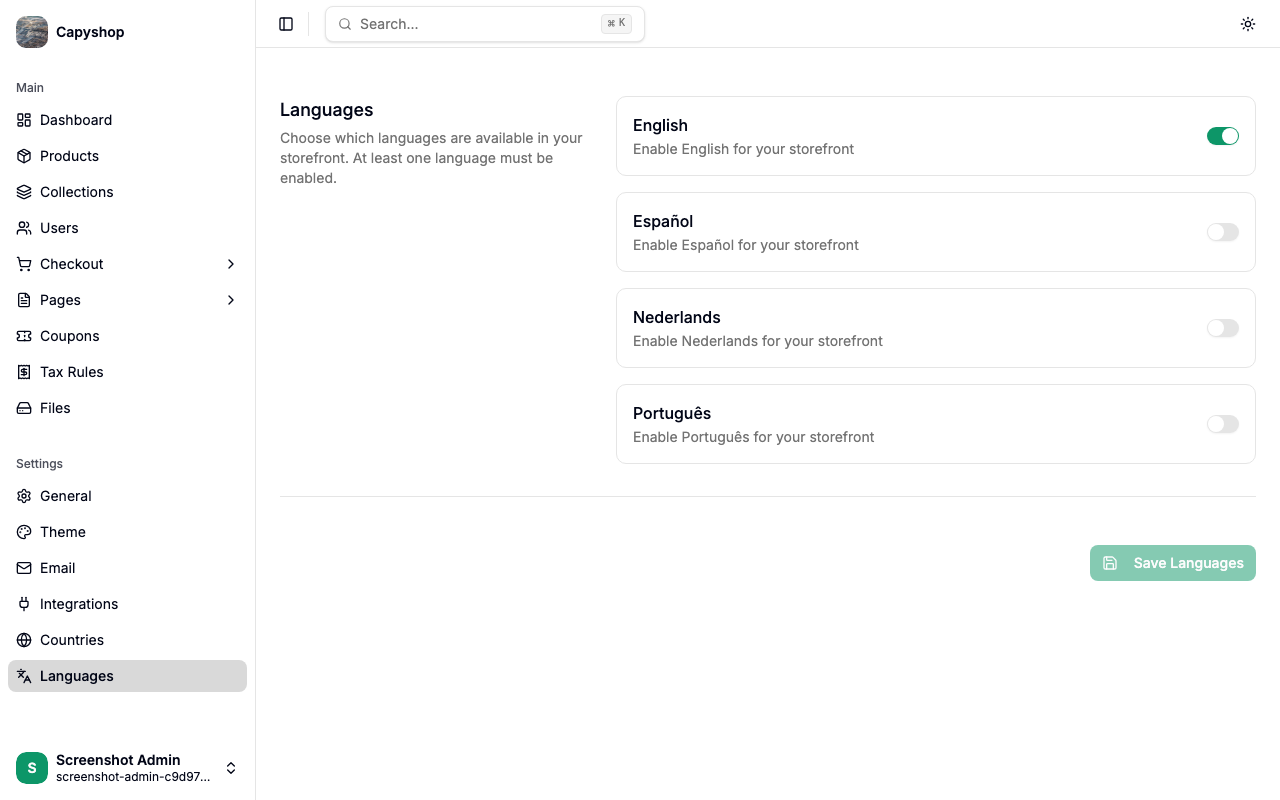
The available languages are:
| Language | Locale code |
|---|---|
| English | en |
| Español | es |
| Nederlands | nl |
| Português | pt |
Toggle on any locales you want to support, then click Save Languages.
Language fallback for visitors. Server-rendered storefront pages and order emails resolve the locale in this order: a logged-in customer's stored preference, then the visitor's
localecookie, then the first language enabled here, finally English. A stale cookie pointing at a language you've disabled will harmlessly fall through to your first enabled language.